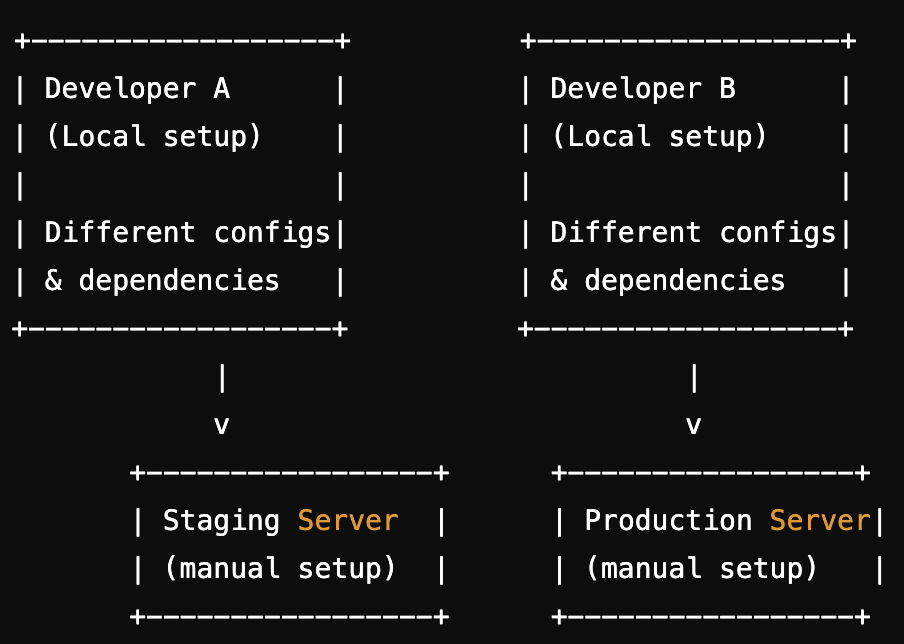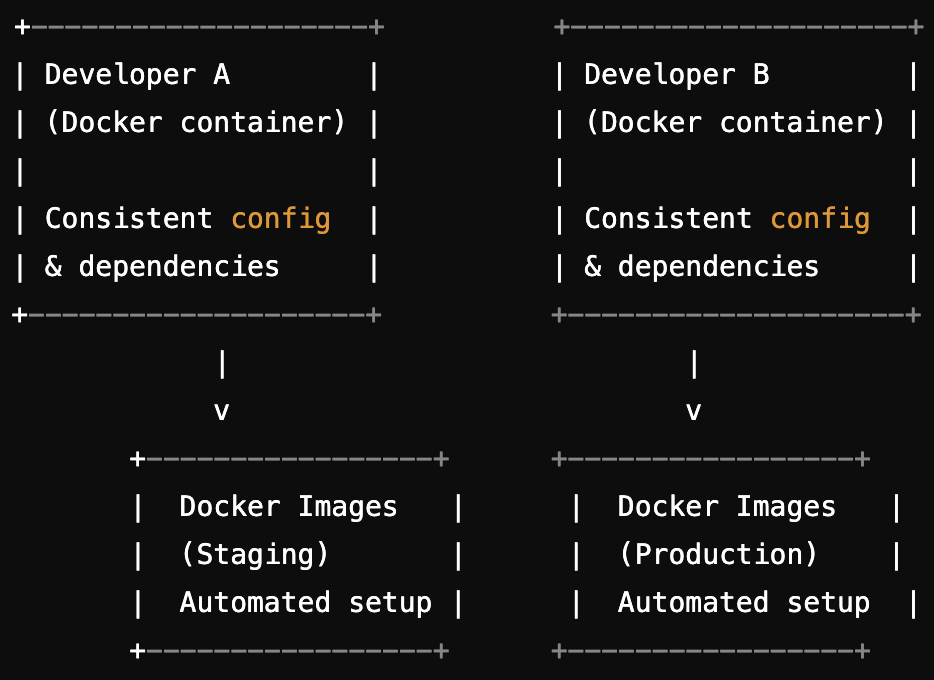


Deploying a Ruby on Rails app with Docker is a great way to streamline development and production workflows. By Dockerizing your Rails app, you can ensure consistency across environments, simplify deployments, and reduce potential errors.
But how do you avoid common pitfalls and get the most out of Docker for your Rails application?
Ruby on Rails developers benefit immensely from Docker’s capabilities to handle environment setup, dependency management, and deployment. This guide explores the key steps for Rails Docker deployment, highlighting the best practices to follow for an efficient setup. No matter if you’re new to Docker or looking to refine your process, these tips will help you optimize performance and keep your app running smoothly in both development and production environments.
Deploying Ruby on Rails applications comes with challenges, such as managing Ruby, Node.js versions, and database dependencies (e.g., PostgreSQL). Docker simplifies this process by containerizing the application and bundling all its dependencies within a single portable unit.
A Docker container encapsulates everything needed to run the app, ensuring consistent behavior across local, staging, and production environments.
Rails Docker deployment offers following benefits:
1. Maintain consistency: Rails containerization provide an identical environment across different stages (development, testing, production).
2. Streamline environment setup: Every developer on your team can work within the same environment without configuring local machines individually.
3. Simplify scaling: Docker enables easy scaling of services like Redis, Sidekiq, and background jobs.
4. Enhance portability: Deploying across platforms (e.g., AWS, Heroku, on-premise servers) is seamless with Docker.


Now that we know what Dockerization is and why Rails containerization is necessary, let’s understand how you can set up Docker for Rails:
The first step in Dockerizing a Rails application is setting up a Dockerfile and Docker Compose to manage dependencies and services like databases and background workers.
A Dockerfile defines the environment in which your Rails application will run. Below is a basic Dockerfile for a Rails app:
Curious to know what has happened above? Well, here is the simple explanation of Rails Docker deployment:
● The official Ruby image is used as a base.
● Next, we installed system dependencies like libpq-dev (PostgreSQL libraries) and Node.js.
● Gems are installed using Bundler.
● The application code is copied into the Docker image.
● Environment variables are set to ensure Rails runs in the correct mode.
Rails applications often rely on multiple services, such as a database and background processing with Redis. Docker Compose simplifies the orchestration of these services by allowing them to be defined in a single docker-compose.yml file.
Here’s an example of a multi-service Docker Compose setup for a Rails app:
● App service: Defines the Rails app, mounts the local codebase, and exposes port 3000.
● Database service: Runs a PostgreSQL container with a specified username and password.
● Redis service: Handles Redis for background jobs or caching.
By using Docker Compose, you can spin up the entire application stack with a single command: docker-compose up.
To reduce build times, especially during development, Docker utilizes caching layers. A best practice is to copy the Gemfile early in the Dockerfile to minimize unnecessary rebuilds when code changes.
This ensures that gems are only re-installed if the Gemfile changes, saving time during subsequent builds.
Learn advanced caching techniques for Ruby on Rails.
Environment variables are crucial for storing sensitive information like API keys or database credentials. Docker Compose allows you to define environment variables, but for production, it’s best to use Docker secrets or encrypted environment files.
Example for defining environment variables in docker-compose.yml:
For production, tools like dotenv or Docker's built-in secret management system should be used to securely manage sensitive data.
Docker Compose Rails offers multiple benefits. Scroll down to find the Docker for local development.
Docker helps prevent the infamous “works on my machine” problem by ensuring that the development environment mirrors the production environment. This eliminates inconsistencies that arise from developers using different local setups.
Key practices:
● Use volumes to mount the local code into the Docker container so changes are reflected immediately.
● Define services like PostgreSQL, Redis, and background workers in docker-compose.yml to simplify the setup process.
Example Docker Compose configuration for local development:
Here are the best practices you must consider for production deployment Docker Rails;
Multi-stage builds allow you to create efficient, slim production images by separating the build and runtime stages. For example, you can include build dependencies (like Node.js) in one stage and exclude them from the final production image.
This approach reduces the final image size and improves security by keeping only the essentials in the production environment.
For production, you can further minimize image size by excluding development and test gems:
Removing cache files and unnecessary libraries also helps to keep the image lean.
Production deployments require secure handling of sensitive data such as database credentials. Use Docker’s secret management capabilities or external secret management tools like AWS Secrets Manager for securely storing environment variables.
● Isolating Environments: Use different Docker Compose configurations (e.g., docker-compose.dev.yml vs docker-compose.prod.yml) for different environments.
● Database Migrations: Be sure to run migrations automatically upon starting the container in production (e.g., by using an entrypoint script).
● Monitoring and Logging: Ensure Docker logs are integrated with your application’s logging system for monitoring and debugging (use tools like the ELK stack).
Rails CI/CD Docker ensures consistency across development, testing, and production environments. Tools like GitHub Actions, CircleCI, and GitLab CI are commonly used for automating tests and deployment.
To set up a basic CI workflow with Docker in GitHub Actions:
The workflow sets up Ruby, installs dependencies, configures a PostgreSQL database, and runs the Rails test suite.
You can extend this workflow to automate deployment to production environments, ensuring your CI/CD pipeline is seamless and reliable.
Besides following all the practices for production deployment Docker Rails, make sure you don’t miss out on following information.
To speed up builds, make sure to leverage Docker’s layer caching. Docker caches layers during the build process, which can significantly speed up subsequent builds if nothing has changed in those layers.
Ensure that frequently-changing files (like the application code) are added later in the Dockerfile, and rarely-changing files (like Ruby gems) are added earlier. This way, Docker will only rebuild the final layers when you make changes to your code, and the earlier layers (which install dependencies) are cached.
For effective monitoring and debugging in a Dockerized environment, centralized logging is important. Instead of logging to local files, ensure your application logs to stdout/stderr, so Docker can capture and forward them to a logging system (such as ELK stack, Fluentd, or AWS CloudWatch).
Docker allows you to define health checks to monitor the status of your containerized Rails application. This is useful in production environments where you want to ensure that your application is running correctly, and containers are restarted automatically if they become unresponsive.
For a Rails app, a typical health check might hit the /healthcheck endpoint, which could return a simple status:
For performance, it's beneficial to store temporary data (such as cache or session data) in memory rather than on disk, especially in a containerized environment. Docker allows you to mount a tmpfs volume, which stores data directly in memory.
For example, in docker-compose.yml, you can add a tmpfs configuration for your temporary files:
This reduces disk I/O and can significantly improve the performance of your application.
Ensure you set resource limits on your containers to prevent a runaway container from consuming too much memory or CPU. In docker-compose.yml, you can specify resource limits like this:
This helps in optimizing resource usage and ensures your app doesn't impact the performance of other services running on the same host.
Security is crucial when deploying applications in Docker. Here are some security best practices for Rails apps in Docker:
Docker not only simplifies the deployment process for Ruby on Rails applications but also enhances productivity by reducing the complexity of managing environments and dependencies. By following these best practices, you’ll streamline your deployment pipeline and ensure a robust, scalable setup for your Rails app.

Techdots has helped 15+ founders transform their visions into market-ready AI products. Each started exactly where you are now - with an idea and the courage to act on it.
Techdots: Where Founder Vision Meets AI Reality
Book Meeting